
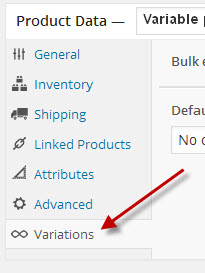
It is in the Variations setup where you actually define the variable for a specific product. Up to this point it has been setups to allow definition for the product variables. To enter the Variations setup, click on “Varations” in the Product Data menu.
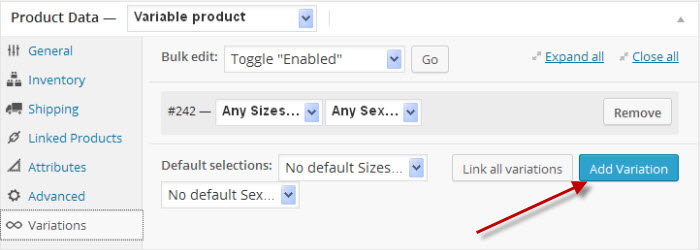
When first entering the Variations setup, for a product the first time, you will be presented with a screen something like the following. Click on the “Add Variation” to start the variation setup.
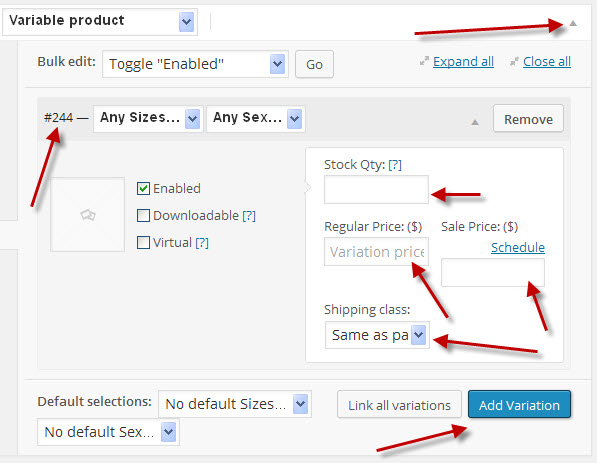
Here is the variation setup. Note that the red arrow points to an open up or close down this specific variation.

Now we need to setup the specifics for this variation. Select the desired variation from the Attribute drop down boxes. Here we have set attributes Small for size and Men for sex. Following is a breakdown of each setup item. (Refer to the image below.)
- #244 is this variables identifier.
- Directory under the identifier is a window to insert an image of your product for this variable. You could have shirts of different colors and this is where you would select the appropriate image.
- Check box Enabled – For this variable to show on your product page, this check box must be checked. Conversely, if you want to temporary suppress this variable, remove the check mark.
- If the product is a downloadable product, place a check mark in this box.
- If the product is a virtual product, place a check mark here if the product is not shipped or not shipping costs are involved.
- If managing product, set your stock quantity in the “Stock Qty” box.
- Enter the price of the product.
- Enter the sales price if this product is for sale and the schedule of the sale. (Note: the date format is YYYY-MM-DD.)
- Select the shipping class. (Note: Shipping classes must first be setup in the Products->Shipping Classes.)
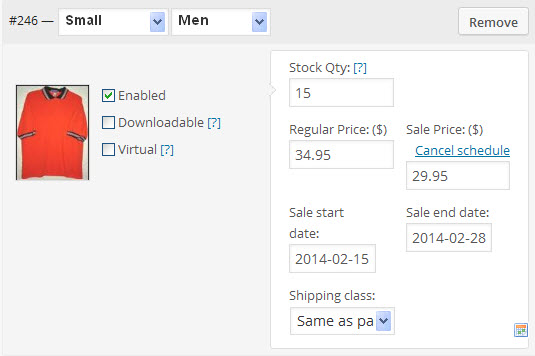
This is what a filled out variable may look like:
Next you need to follow the same process as above for each variation of your product. To start a new variation, click on the “Add Variation” box again.
You can also have the system create the variations for you by clicking on “Link all variations”. When doing this the number of variations can become quite large and the system will warn before doing the creations.
In the next lesson we discuss the product descriptions.