
This lesson will show you how to work with the log files. Including viewing, clearing, deleting, printing and, testing.
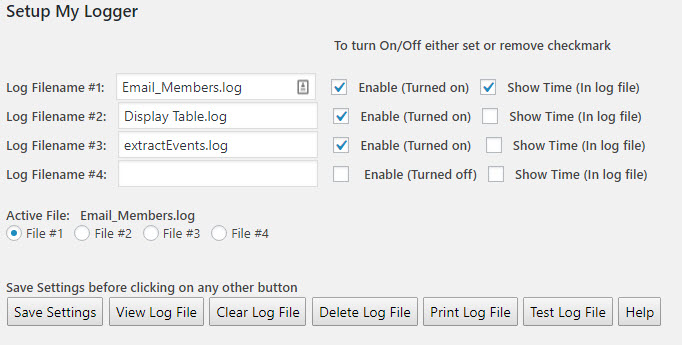
In the example above, we have three log files setup. Log Filename #1 shows the name Email_members.log. To the right of the filename there is a checkmark showing that the logging is enabled and to capture the time of the log.
Towards the bottom of the setup is radial buttons to select the Active File. These buttons are only used when working with the individual log files. In the example above, File #1 is selected. When using any of the buttons, except “Save Settings” and “Help”, the file number selected will be the log file that the respective button will use.
Viewing the Log File
First verify that the Active File is set to the desired that you wish to view. Then clock on “View Log File”.
You will get a popup of the contents of the log. See example below:
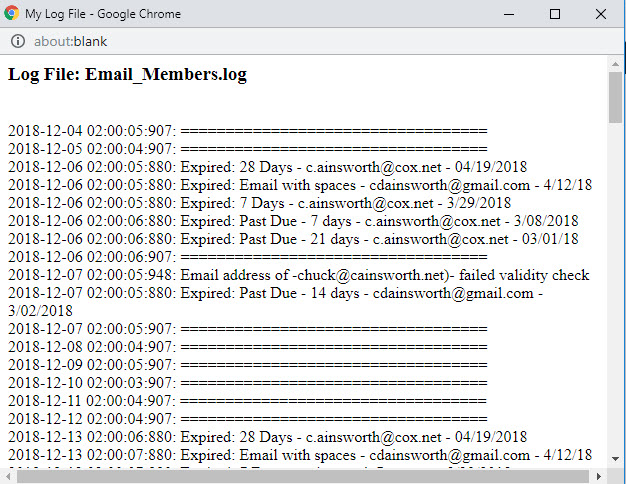
The above example shows date and time that process was executed and the logging information that was captured.
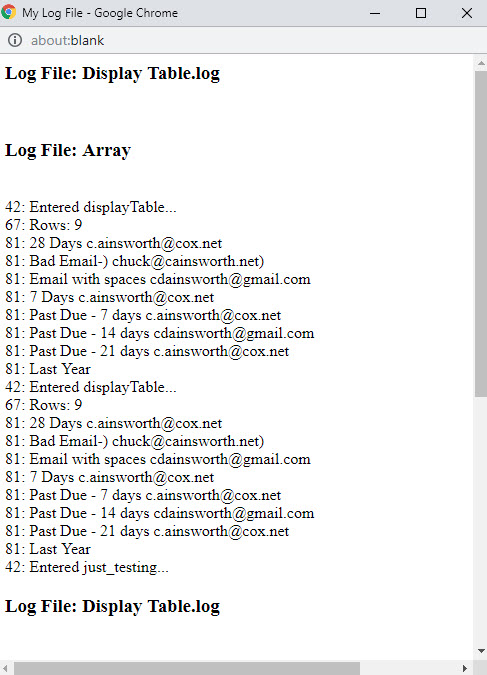
The log file below shows a logfile without the date/time being captured.:
Clearing, Deleting, Printing, Testing the Log Files
Clearing, Deleting, Printing, and Testing the log files perform the function that the button represents. When first setting up a new log file it is always a good idea to test the log file first. Then view the log file and then clear it before running your own plugin. This will remove the test data that is inserted when testing the log