
TinyMCE Advanced vs Ultimate TinyMCE
TinyMCE and TinyMCE are plugins which are editors to facilitate the entry/editing of data when creating or updating post or pages within WordPress.
When in a post or page and using the visual editor, I believe either TinyMCE Advanced (by Andrew Ozz) or Ultimate TinyMCE (by Josh Lobe) is must. Both of the these plugins offer the same functionality but where the differences come in is in the setups.
TinyMCE Advanced
The plugin TinyMCE Advanced plugin can be found by entering your dashboard in WordPress, Plugins and clicking on “Add New”. In the search bar, type in” tinymce advanced”. Select it from the list provided and perform a normal plugin installation and activation.
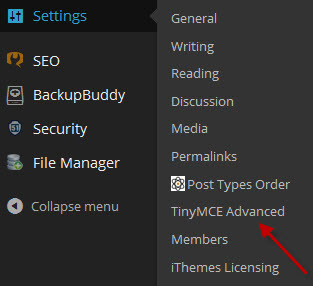
After TinyMCE Advanced has been activated you will need to load the desired features in the post/pages edit bars. To do that go into the settings and make the necessary changes. The settings for TinyMCE are found in your dashboard in the “Setting” menu.
 To add to the edit toolbar you just drag and drop the desired features, which are represented by an icon, from the bottom set of icons to the upper set of icons into the desired row. See example below:
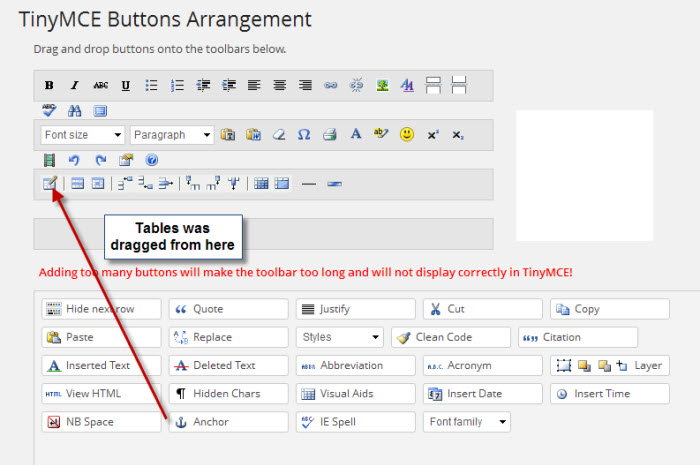 Just repeat the process until you have selected all the features that you need the most. (Note: Just apply those features you really need as loading too many features will slow down the page load). Below the bottom set of icons there are additional features that can be turned on such as; Advanced Image, Advanced List Options, Context Menu and others. I usually turn these on as well as “Stop removing the <p> and <br/> tags”. This comes into play when looking at the code in the Text editor.
I have experienced some issues with this plugin stripping out HTML code that I entered in the Text editor and then reviewing the results in the Visual editor. Other than that, I have been happy with this plugin.
Ultimate TinyMCE
The plugin Ultimate TinyMCE provides the same functionality as TinyMCE Advanced but the setup is done differently. Finding the plugin and installation is the same as TinyMCE Advanced with the exception that you are looking for “Ultimate TinyMCE”.
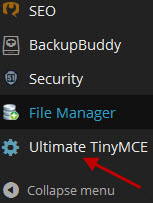
The access to the settings for Ultimate TinyMCE will be found in the dashboard. Just click on Ultimate TinyMCE.
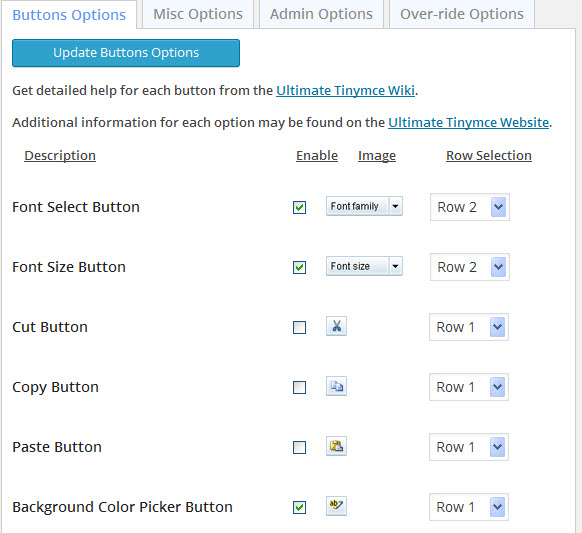
The plugin setup is completely different from that of TinyMCE Advanced. This setup is comprised of setting check boxes and the desired row you that wish your icon to display on. In the list provided is just about any feature that you may need when editing.
 I have found this plugin to work a little better in some of the functionality. For instance, it does a much better job in retaining HTML code that you may enter using the Text editor. Another thing that I like is the complete list of font sizes whereas TinyMCE Advanced gives you a list of the 7 most common sizes.
Summary
In summary, I like both of the these plugins. I have found TinyMCE Advanced easier to set up the way I want it and Ultimate MCE seems to handle some of the functionality better. Ultimate TinyMCE does have a Pro version which offers additional functionality for a price. I have used both of these plugins and continue to do on my websites. My suggestion would be try one or both, learn how it works and stick with it.
Chuck Ainsworth
AinsworthEtc.com