WordPress Administration
If you are new to WordPress you may not be aware of how to go about administering it. In this blog I will try to show you some of the tips I use. I am going to assume that you already have a WordPress site installed and operational.
Logging In
Before you can perform any administration duties you must be logged into the administration area of WordPress. Logging into the WordPress administration area can be done in many different ways, depending on the configuration of your website.
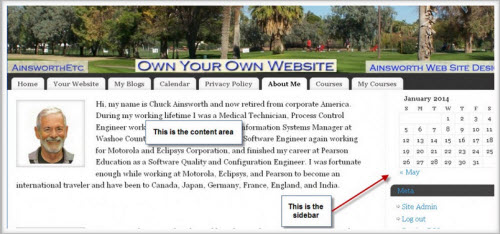
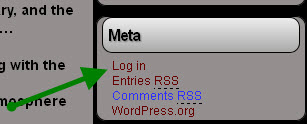
If your website has a Meta area in a sidebar, you can start your log in process by clicking the “Log In” link.
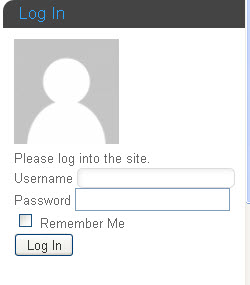
 If a special login has been created, it may look like this:
 Or, to manually log in, type “/wp-admin” following the domain name. Note: This must be at the root directory of the website. Examples:
https://www.ainsworthetc.com/wp-admin
http://gwrraaz.org/azr/wp-admin
The second example is valid as “azr” is root directory of this website.
 If using the Meta or Manual log in you will be presented with the following screen or facsimile of it. (This the default login for WordPress).
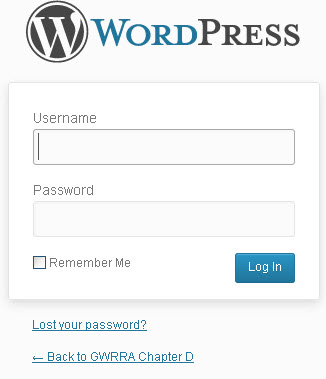 Just enter your username and password and you will be directed to the WordPress Administration area.
WordPress Toolbar
After you have logged into the admin area of WordPress, a toolbar will be presented at the top of pages. The WordPress Toolbar is an option that can be turned off in your user profile. (It is on by default.) If the Toolbar is turned on when you are logged into WordPress, you will see the toolbar immediately above your website header. Here is a picture of what it looks like:
![]()
Below, where is the Red Arrow is pointing will be the name of your website. Clicking on it will toggle between your website and the administration area of your website.
 Clicking on your Name will bring up a down drop window where you can edit your profile or log out.
 After you have the toolbar being presented you can click on any the items and see what the options. The ones I use the most are “Your Website”, “New”, and “Howdy,<your name>”.
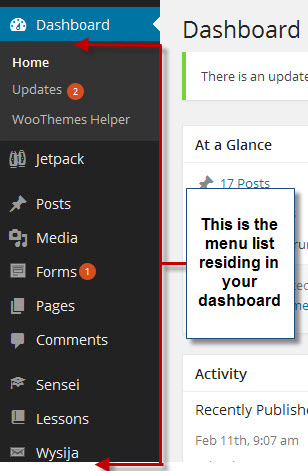
The Dashboard
The dashboard, in the administration area, is where a list of links for the respective actions to take place reside. This list will vary in length depending on the number of plugins and their setups.
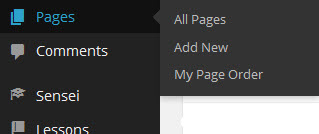
 When hovering over a name with your mouse, a sub-menu will be presented beside the name. When clicking on the name, the item will open and the sub-menu will be presented below the name.

New Site Setup
Just a little additional information that falls under WordPress administration is the setup of a WordPress site for the first time.
After you have done your initial WordPress installation and you are logged into the administrative area, the following is a suggested order of setup. At least, this is the major items of my checklist.
- Users -> Add New (Add yourself as an administrative user)
- Settings -> General (Set website name, date and time formats)
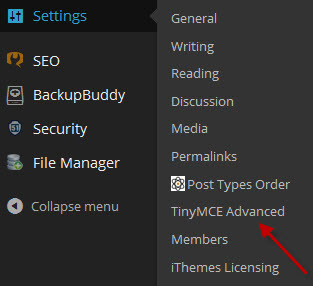
- Settings -> Permalinks (Set Permalink Settings to “Post name”)
- Theme (Find and install the theme that you are going to use)
- Website Header (Install the header for your website)
- Website Background (Setup the background for your website)
- Plugins (If you know the plugins that you are going to use, install them now.)
- Start loading your posts and/or pages (Content).
- Make tweaks to your theme to show the desired output.
Summary
One of the things that I like about WordPress is that it is very easy to administer. When I first started I struggled with some of the conventions until I really started learning how to use some of the features. For me, learning the toolbar was one of the greatest assets. The next few blogs will be discussing the default items in the WordPress dashboard.
Chuck